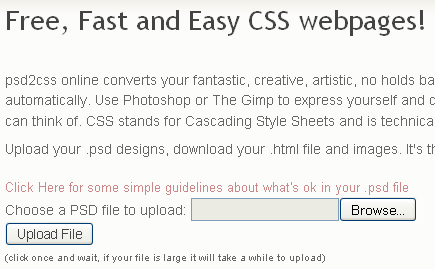
Are you a kickass Photoshop person? Can you create amazing looking designs using your Photoshop skills? If so, you might find yourself creating web site mockups in Photoshop for clients and then passing on the design to web site coders to get the final product in HTML.
If you’re one of the many people who create web sites in Photoshop, you might be interested in a free online service that will let you convert your Photoshop design into a strict XHTML compliant CSS web site!

Trying to understand and code a CSS website can be a difficult and arduous task (thanks to Microsoft and there four versions of IE in the market!). It’s much easier, at least for me, to play around in Photoshop and create simple yet cool-looking designs.
PSD2CSSOnline is completely free and allows you to upload files in either Photoshop or GIMP, so if you don’t have a copy of Photoshop, you can use the free open-source photo-editing program, the GIMP.

When creating your web site design, you need to make sure you use layers as this is what PSD2CSSOnline reads to figure out the different parts of a web page. The trick is to keep the parts of your page that you want separate in different layers of your .PSD file.
There are a couple of simple guidelines you should follow in order for this process to work.
- Don’t make a bunch of layers – If you are an advanced Photoshop user, you might have created many layers that all combine together to make a single object. For example, your logo might actually be made of 5 to 6 different layers – but the logo is still one object. Do not upload the file with the logo still separated out into the 5 or 6 layers – merge them together into one single “logo” layer.
- Opacity and Blending Options – You need to rasterize any layer with opacity at anything other than 100%. In Photoshop, you can rasterize a layer by right-clicking on the layer and choosing “Rasterize Type” or “Rasterize Layer“. In the Gimp, create an empty layer just below the one you want to rasterize and then right click on the new layer and choose “Merge Down”. This will rasterize the layer and merge it.
- Modify Gimp Layer Sizes – For some reason the Gimp likes to make layers the same size as the image. This makes inefficient as you end up with lots of big image files in your web page. For any layer in the Gimp where the object is smaller than the whole page (most of your layers), click on the layer, then in the layer menu choose “Autocrop Layer”.
- 4MB PSD File Size Limit – This is the largest file size that you can upload, but it was just a random number picked by the creator. You can email him and he’ll let increase the limit!
That’s all you need to keep in mind! Go ahead and create your web page in Photoshop or GIMP and then upload it to see how it turns out!
Hopefully, the look you had created comes out in your final HTML output. You can also try out a couple of other online services for converting PSD designs to web pages, but they are not free:
This service is also called PSD slicing, if you want to know the technical term for it. If you don’t feel like paying people to do this slicing for you and PSD2CSSOnline didn’t work out for your complicated design, you can do the slicing yourself!
Here are some cool tutorials and guides that you can read on how to design a site in Photoshop and then convert it into HTML:
While PSD2CSSOnline may not be the best tool for big designers, it’s a great way to get started if you’re not very familiar with CSS and HTML coding. And it’s free, so it’s always worth a shot! Enjoy!


How To Convert Photoshop Designs To Css Website ~ Techno Guide >>>>> Download Now
ReplyDelete>>>>> Download Full
How To Convert Photoshop Designs To Css Website ~ Techno Guide >>>>> Download LINK
>>>>> Download Now
How To Convert Photoshop Designs To Css Website ~ Techno Guide >>>>> Download Full
>>>>> Download LINK