Wednesday, March 5, 2014

How To Convert Photoshop Designs to CSS Website

Are you a kickass Photoshop person? Can you create amazing looking designs using your Photoshop skills? If so, you might find yourself creating web site mockups in Photoshop for clients and then passing on the design to web site coders to get the final product in HTML.
If you’re one of the many people who create web sites in Photoshop, you might be interested in a free online service that will let you convert your Photoshop design into a strict XHTML compliant CSS web site!
psd2css online
Trying to understand and code a CSS website can be a difficult and arduous task (thanks to Microsoft and there four versions of IE in the market!). It’s much easier, at least for me, to play around in Photoshop and create simple yet cool-looking designs.
PSD2CSSOnline is completely free and allows you to upload files in either Photoshop or GIMP, so if you don’t have a copy of Photoshop, you can use the free open-source photo-editing program, the GIMP.
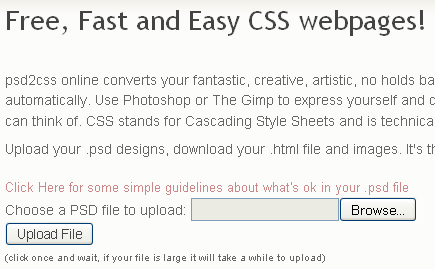
psd to css
When creating your web site design, you need to make sure you use layers as this is what PSD2CSSOnline reads to figure out the different parts of a web page. The trick is to keep the parts of your page that you want separate in different layers of your .PSD file.
There are a couple of simple guidelines you should follow in order for this process to work.
  • Don’t make a bunch of layers – If you are an advanced Photoshop user, you might have created many layers that all combine together to make a single object. For example, your logo might actually be made of 5 to 6 different layers – but the logo is still one object. Do not upload the file with the logo still separated out into the 5 or 6 layers – merge them together into one single “logo” layer.
  • Opacity and Blending Options – You need to rasterize any layer with opacity at anything other than 100%. In Photoshop, you can rasterize a layer by right-clicking on the layer and choosing “Rasterize Type” or “Rasterize Layer“. In the Gimp, create an empty layer just below the one you want to rasterize and then right click on the new layer and choose “Merge Down”. This will rasterize the layer and merge it.
  • Modify Gimp Layer Sizes – For some reason the Gimp likes to make layers the same size as the image. This makes inefficient as you end up with lots of big image files in your web page. For any layer in the Gimp where the object is smaller than the whole page (most of your layers), click on the layer, then in the layer menu choose “Autocrop Layer”.
  • 4MB PSD File Size Limit – This is the largest file size that you can upload, but it was just a random number picked by the creator. You can email him and he’ll let increase the limit!
That’s all you need to keep in mind! Go ahead and create your web page in Photoshop or GIMP and then upload it to see how it turns out!
Hopefully, the look you had created comes out in your final HTML output. You can also try out a couple of other online services for converting PSD designs to web pages, but they are not free:
This service is also called PSD slicing, if you want to know the technical term for it. If you don’t feel like paying people to do this slicing for you and PSD2CSSOnline didn’t work out for your complicated design, you can do the slicing yourself!
Here are some cool tutorials and guides that you can read on how to design a site in Photoshop and then convert it into HTML:
While PSD2CSSOnline may not be the best tool for big designers, it’s a great way to get started if you’re not very familiar with CSS and HTML coding. And it’s free, so it’s always worth a shot! Enjoy!

Unlimited Free Call even without internet connectivity with FREEKALL

One thing which is sure to get everybody’s attention is the word ‘free’. Be it a free gift or a free beer or even some free advice, it is lapped up very fast. Seth Godin has written an entire book on the concept.

Capitalizing on the same is ‘FREEKALL’, a Bangalore-based Cloud telephony startup. They have developed a service where a user can call any mobile or landline for free without using internet or installing any applications.

Founded by Yashas C Shekar, Vijayakumar Umaluti and Sandesh E, FREEKALL is being launched today and is open for public beta. To use the service, users have to call their number 080-67683693 after which the call will drop and they will receive a call back. They can answer the call and dial the number of the person they want to talk to, followed by the symbol #. Both calls will be bridged and users can talk freely.

NOTE: Given number will only work after you register your number to this site .

Team Freecall
Team Freecall

The founders have been working on this concept from the last eight months. Apart from the co-founders, another team member Sabari Jagadisheen played a key role in developing the product. Yashas explains,
With the advent of smart phones, the era of telecommunication has changed horizons and communication has become almost free in developed countries with a number of service providers. But the problem in developing countries is that 95% of the population does not have access to either 3G or 4G which is almost a mandatory to make internet calls using Skype, Viber and other such applications.
freekall-advertisor
solu
In the public beta launch of FREEKALL, people can use three min/day without registering and once they register they get 12 min/day free. Users can register by visiting the website

www.freekall.in

or replying to their SMS template by filling the provided details. Once the beta is over, the 12 minutes/day cap will be released and users can talk for as long as they want for free.

Idea and Opera partner to offer Web Pass for short-term mobile Internet needs


opera_webpass_app_official.jpg


Telecom operator Idea Cellular has teamed up with Opera Software to launch Idea Web Pass, based on the Opera Web Pass platform unveiled earlier this week.

The Idea Web Pass enables users to enjoy customized and short-term mobile Internet packages via its three different plans, or passes, which can be used only via the Opera Mini browser. The newly launched Idea Web Pass packages are the -

Daily Internet Pass for Rs. 8 
Weekly Facebook Pass for Rs. 7, and 
Weekly Internet Pass for Rs. 30.

This will make it easier for anyone to get online, even if they are using a budget phone and don't want to pay for a full data plan.

Users don't have to go to any settings page to activate the web pass, but can instead access it directly from the Opera Mini browser on their mobile phones. If they click on "Idea Web Pass" on the Speed Dial page, then choose the subscription they want to use.

Idea subscribers can access the Idea Web Pass page via the Opera Mini mobile browser's Speed Dial page, and can also manage their subscriptions. The packages are available for both prepaid and postpaid Idea users. While the amount will be instantly deducted from the balance of prepaid users upon purchase of the Web Pass, it will be added to the bill of postpaid users.

The Opera Web Pass allows users to purchase short term data access from their respective mobile telephone carriers. It allows users to buy specific passes, for example unlimited browsing for a day. It also allows operators to offer other incentives like free Internet access for watching advertisements. Couple that with the fact that Opera Mini runs on a wide variety of platforms, and comes preloaded on several budget handsets, this move will make it easier than ever for people to get online, even from a basic phone, and even without a relatively expensive data pack.

Idea told NDTV Gadgets that these are just introductory packs, and that it may introduce more packages in the future, based on user response. "Opera's Web Pass platform allows operators to monitor and modify the Web Pass packages in near real-time," the statement said. "Idea can add/ test any combination of web pass easily and can choose to retain it based on user response."

"At Opera, we work towards connecting the world, and we believe that the web is for everyone. We trust that this partnership with Idea Cellular will help us to reach out to first-time users who have not been exposed to the web," says Sunil Kamath, Vice President for South Asia, Opera Software. "We have observed an increase in the usage of mobile Internet in this country, which will only continue to grow, inline with the expansion of 3G usage in more cities. Idea Web Pass will entice more users to get online and serve as a catalyst to boost mobile internet usage."

"Idea has consistently focused on growing data penetration across the country; we understand that a lot of Idea users choose to access a few preferred sites rather than buying full data plans. Our partnership with Opera for the web pass will help us to reach out to those users and provide them with a convenient data-plan option. We believe that more and more internet users accessing web via mobile phones will usher in a new wave of mobile-data growth in the country," says Sashi Shankar, Chief Marketing Officer, Idea Cellular

5 Ways to Detect Invisible Users on Yahoo Messenger

Are you looking for a quick way to detect whether one of your Yahoo Messenger buddies is ACTUALLY offline or just Invisible? Apparently lots of people would like to know how to detect whether someone is invisible or not! I only realized this because I’ve been asked 10 times! I’m still not sure why it would matter because OBIVOUSLY your buddy doesn’t want to talk to you otherwise they would not be invisible!
But either way, I guess some people just need to know for the sake of knowing (especially guys and gals who want to know whether someone is avoiding them).
So here’s 5 ways I found on the Internet that you can use to discover whether a buddy is really online and set as invisible or whether they are simply logged off.
Update 4/10/2012 – All of these sites don’t exist or work anymore, so please go through the comments to find working sites. 
1. Invisible Scanner (no longer working) - Does just as the name suggests, finds those invisible folks and exposes them for who they really are! Worked on my tests.
yahoo invisible scanner
2. Invisible.ir (doesn’t work either)- Another new one that works really well. You can also do some other things like check multiple Yahoo users at once and detect a users main Yahoo ID.
find invisible users
3. Buddy Spy (no longer exists)- The other two services mentioned above were web services, but Buddy Spy is a little program that you can download and install on your computer. It suggests that it’s “simply the best in invisible detection”! I’m not so sure about that, but I’ve heard it works most of the time.
buddy spy
4. Xeeber.com (neither does this site) - Another online service to detect invisible users, but I am putting this at number 4 because it didn’t work when I tried it. Maybe the site was down, but entering and name and clicking search resulted in nothing happening! So maybe it was just bad timing by me because some people swear by it!
xeeber
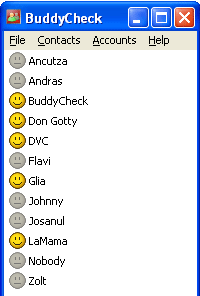
5. BuddyCheck (doesn’t exist either)- Another program that you can download and install, which will show you exactly who is online and who is offline. This is the only one that costs some money, about $20, so if you’re REALLY crazy about finding out if someone is truly invisible, this is the app for you!
buddy check
Any other method you use to detect invisible users on Yahoo? Post a comment and let us know! These of course are not 100% correct all of the time, so you should take the results with a grain of salt. Also, test it first on yourself or a friend to see which one works best. Enjoy!

How To Increase iPad Battery Life

I have an iPad 2 and I realized over the last few months that my battery was draining faster than I would have liked. I was determined to increase the battery life and I was suprisingly successful. At first I thought the battery was just getting old and could not hold the charge as long, but I had been so particular with charging the iPad that luckily that wasn’t the case.
Before I started this endeavor, I noticed that the iPad would last about 3 to 4 days with my regular use, which was about 30 mins to an hour a day. After I implemented some changes, I was able to get the iPad to last almost 7 to 8 days without having to charge it! And a lot of them were very easy fixes that just never occurred to me before. In this article, I’ll mention the 5 tweaks that increased the battery life of my iPad. If you have others not mentioned here, let us know in the comments.
ipad battery life

Method 1 – Charge When Low Battery

One of the main reasons why my ipad battery has lasted two years is because I still follow the charge only when the battery is really low rule. Yes there are some that say that doesn’t matter as much now, etc, etc, but whatever. I still do it and it seems to work. For example, I usually wait till the iPad is below 5% and then I start charging it.
Also, I do a couple of other things. Firstly, I make sure that I let it charge all the way to 100% without disconnecting it. A battery gets worn down by charge cycles, so if you stop in-between and then charge it again and then stop, over and over, the life of the battery will decrease.
Lastly, I try my best to disconnect it immediately after it hits 100%. The iPad has some mechanism to let the device run on battery and then re-charge when it hits 100% and you keep it connected to the power source. It’s supposed to make the battery last longer, but the fact that it keeps having to do that just means you’re wearing the battery down more. If you can disconnect it ASAP after a full charge that is best.

Method 2 – Disable Lock Screen Notifications

The next major tweak that made a whole lot of difference was disabling notifications on the lock screen. Basically, whenever you get a notification from any app (and I got a whole lot because I have 100+ apps installed), it will appear on the lock screen and they display will turn on in order to show it. The display comes on for a short time, but I realized that this was happening all the time. Every 15 to 20 minutes, my iPad would turn on to display a Facebook notification, iMessage notification, new magazine notification or something else.
All that time the display was on for showing notifications, the battery was being slowly eaten up. I quickly realized that I had to just turn off notifications on the lock screen and no more constant screen light-ups.
Ipad notifications
You’ll have to go through each app under Notifications, but it’s well worth the time. You don’t have to turn off notifications completely, just make sure that you turn off View in Lock Screen for anything you don’t feel is very important. I switched off notifications on the lock screen for pretty much everything except a few apps I wanted to get visual alerts for.
What’s nice is that once you unlock the iPad, you’ll then see all the notifications appear in the banner at the top. Make sure you also turn on Banners instead of Alerts. Recently, I also turned mine off for iMessage because I realized with the new unified iMessage in iOS 6, my iPad would keep turning on every time I got a new iMessage on my iPhone. If I had an extended conversation, the iPad would light up the whole time. Definitely not necessary.

Method 3 – Auto-Lock

If you go to SettingsGeneral, and Auto-Lock, you should set this value to the lowest possible, which is 2 minutes.
Ipad autolock
Unless you really need the display on for longer, 2 minutes without using it is more than enough. After that, you want it to automatically turn off. The less the screen is on when you’re not using it, the longer your iPad battery will last.

Method 4 – Turn Off Cellular Data

My iPad is Wifi+3G and the 3G used to always be on. I realized this was pretty useless since I only used it when I left the house. So maybe a few times a week, I would be using 3G, otherwise it was always connected to WiFi.
For the new iPad, you’re talking 4G, which probably eats up even more battery. I just turn off cellular data until I actually need it. Just go to Settings and tap on Cellular Data and switch it to Off. 
Cellular data ipad

Method 5 – Bluetooth

Lastly, I also disabled Bluetooth as I didn’t use this feature all the time either. Whenever I needed to connect my bluetooth headset, I would just go in and turn it back on. After I’m done, I turn if back off. It saves quite a bit of battery if you can be disciplined about it and turn it off when you don’t need it.
Bluetooth ipad

Bonus Method – Do Not Disturb

if you recently updated to iOS 6, then you probably heard of Do Not Disturb. It’s a new feature that will silence all FaceTime calls and any alerts. This is useful if you don’t feel like doing Method 2 mentioned above. Then you can just leave everything and turn on Do Not Disturb for the portion of the day you don’t use the iPad.
If you go to Settings, first turn on Do Not Disturb. After that, tap on Notifications and turn Scheduled toOn. Then choose the time you want to enable do not disturb. You can also allow FaceTime calls from favorites if you like or disable it. They even have a feature so that if you get a repeated FaceTime call within three minutes, it’ll ring.
Do not disturb
That’s about it! Using these methods, I was able to significantly increase the battery life of my iPad. If you do something different than what I mentioned here, post it in the comments. Enjoy!

4 Affordable 3D Printers

Its seems like everyday I run into some article, tweet or news story about 3D printers. Apparently the price for a good 3D printer has dropped significantly over the last 2 years, which means a regular consumer like you and me can actually afford one.
People have printed 3D iPhone cases, jewelry, figurines, guitars, and even bigger stuff like dresses and cars. It’s gotten quite crazy and since it’s such a new technology that is also cool, it’s becoming quite popular. If you’re interested in getting your own 3D printer and making your own toys for your kids or building something more elaborate, then here’s a quick list of good, but affordable 3D printers.
Of course, there are tens or even hundreds of 3D printers out there, but so far only a handful are being mass-produced and are within the price range of normal consumers. If you have any experience with a 3D printer, feel free to post a comment and let us know.

MakerBot Replicator, 2, and 2X

Replicator2
The folks over at MakerBot know how to make 3D printers. They are the most popular and it’s pretty clear why. The prices for the ReplicatorReplicator 2, and Replicator 2X are very reasonable when you’re talking about 3D printers at $1,750, $2,199 and $2,799 respectively. On top of that, the build quality is first-class and it’s also stylish.
Obviously, the main draw is the fact that it can print 3D objects beautifully. You can print out an entire chess set using this thing! That’s pretty amazing. You can use multiple colors at the same time to print multi-colored 3D objects. The new Replicators also have a host of other advancements that make it one of the best 3D printers currently on the market.

Cube & CubeX

Cube 3d printer
Next down the line is the Cube and CubeX 3D printers. These are also reasonably priced and give you close to the quality of MakerBot. MakerBot still stands out with it’s excellent design and high-quality build materials, but the Cube printers from Cubify are pretty top-notch.
Cube 3d printers
As you can see from the screenshot above, the price of the CubeX goes up quite a bit when you take into account the number of colors you can print at once. It shoots up to $4,000 for the top-of-the-line model. With MakerBot, you can spend a grand less and still print in multiple colors. With the Cube, you can print 3D objects up to 5.5 inches whereas on the CubeX, you can go all the way up to 10.8 inches!

Solidoodle

Solidoodle
Solidoodle is a 3D printer that is a fraction of the cost of other 3D printers. Why? Well it definitely cuts some corners. However, it’s made my a former employee of MakerBot, so that’s a good thing. Priced at $800 for the 3rd generation model, Solidoodle is a great 3D printer for someone who can’t afford the $2K+ robots, but still wants to be able to print their own 3D objects. It’s got less features and definitely doesn’t look as fancy and polished as the Replicator, but it still gets the job done. You can print objects up to 8x8x8, which is pretty big considering the price.

3Doodler

3doodler
If you can’t afford $800 either, then you should check out the 3Doodler Pen on Kickstarter! It’s an amazing pen that lets you draw on a surface or in the air and create a 3D objects for only $75 (or $99 if you don’t back it on Kickstarter in time). As you draw, the pen extrudes heated plastic fed in from the back, which then cools and forms a strong 3D structure.
The great thing about this pen is that it’s so cheap compared to ALL other 3D printers and let’s you start playing around with 3D printing quickly. As long as you can trace, you can create your own 3D objects. Granted these are not going to be professional grade 3D objects by any means, but it’s still pretty cool. Check out some pics below:
3doodler objects
3d printed objects
Not bad for a $75 pen! Delivery of the pen isn’t anticipated until September 2013, so you’ll have to wait a while to get it. However with the low-cost and level of sophistication, it’s definitely worth waiting for. So there are four affordable 3D printers you can purchase to start your own business on Etsy selling unique trinkets. Enjoy!

Which Is Best? GoDaddy vs. HostGator vs. Media Temple vs. BlueHost

Looking for a good place to host your website or blog? There are a variety of different things that you should consider before choosing a web host. The thing about web hosting is, once you pick a host and get your website setup, it can be very difficult to switch hosts in the future.
Thus, picking a web host that will work great for you initially is key. Chances are, you have probably heard of the following hosting companies. Here is how they stack up as far as bang for buck, reliability, and overall deal.
MT

GoDaddy

Godaddy is one of the most popular web hosting companies, most likely due to heavy commercial advertising. Overall, Godaddy is a good webhosting company that offers just about any feature one could ask for in a web host.
Godaddy offers a do it yourself solution for just about any adjustment that you need to make with your domains and hosting. For example, with Godaddy, you can switch the primary domain on your hosting account yourself, by using the change of primary domain wizard.
Some smaller hosting companies do not officially offer a do it yourself solution for things like this. It can be done, but usually requires a call to customer support to have them do it. Godaddy does however, have one major con. They are always trying to markets something to you.
It’s not uncommon to get 2-3 emails a day from Godaddy that are marketing some product to you or trying to make you upgrade to something more expensive. Also, Godaddy does offer a surplus of more features than traditional web hosts. However, they also charge you for the majority of them.
Godaddy’s rates tend to fluctuate a lot, but they do offer a lot of promos which you should take advantage of. The right promo code will get you a domain for 7 bucks and 20% off of your hosting.
godaddy

HostGator

Hostgator is a very simple web host to use. They also have some of the best customer support in the business.When you purchase a domain through Hostgator, you are actually using Registry Rocket services to acquire the domain.
From there, Hostgator registers the domain name to your hosting account. This can be seen as a slight disadvantage. If you want to make domain changes on your account, you have to know how to adjust DNS servers yourself, and do it through Registry Rocket.
However, if you don’t want to bother with making changes like this, just send Hostgator an email and they will do it for you, no charge.  Hostgator has good uptime, and they don’t bug you with marketing offers.
Hostgator rates for hosting and domain purchasing are mid range in price for a web host. But, they do accept promo codes, which can save you a couple bucks here and there.
host gator

Media Temple (MT)

Media Temple is the chosen host by a variety of different labels including: Adobe, Diesel, JQuery, Starbucks, etc… They market themselves as a premium web host. MT’s UI software is unique, similar to Godaddy.
They don’t use cPanel like the majority of generic hosts. Media Temple’s hosting plans are really only suitable for sites that get a lot of traffic. Their prices are considered very high. The lowest Media Temple hosting plan starts at $20 a month, and prices only go up from there.
They do a decent job at not bugging you with marketing plots, and the letters that they do send you are often times useful. Media Temple support is decent.
MT

Blue Host

Blue Host is known for having some of the best hosting rates. Hosting plans start at $6.95 a month and most of the time you can get hosting for under $5 with a good promo code.
As far as reliability, Blue Host has had some trouble in the past, as many users have reported that their sites have gone down. However, Blue Host has gotten several positive reviews as well.
Similar to Hostgator, Blue Host uses the cPanel interface. Blue Host tends to stay on top of hosting trends and add features when necessary and demand is there. Support for Blue Host is generally good.
blue host

Conclusion

In conclusion, here is my opinion on the final ranking of the four web hosting companies.
1. Hostgator
2. Godaddy
3. Blue Host
4. Media Temple
Don’t agree? Tell us why you think the order should be different. Or tell us your favorite web hosting company and why it’s better than the four I mentioned here. Enjoy!